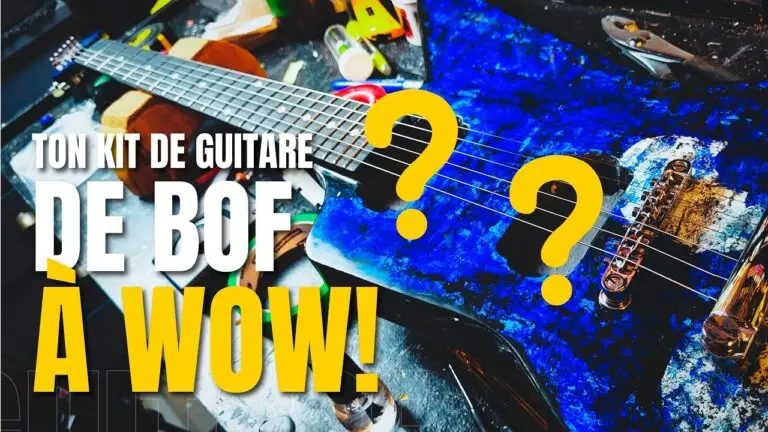
In the last video, I showed you the next kit I was going to build, and we fixed a small dent on the neck. Today, the guitar is ready for finishing. And believe me, we're not talking about just a simple coat of paint.
For this guitar, I decided to go all out with a finish guaranteed to turn heads. You don't need a professional workshop or an art degree to put your signature on a guitar project: I'll show you how today, step by step.
Prepare the surface: apply the texture before the color
The neck is already glued on, the body is sanded, and the sides and back are finished. All that remained was to prepare the top, which already had a sealant applied. So I'm using a methacrylate-based putty (Prestix) to bond it to the sanded sealant.
To apply it, I used a rubber wallpaper roller, which is stiffer than a standard roller. You can see a nice build-up of paint, and that's exactly what we want. Normally, when finishing, we try to avoid texture to get the smoothest finish possible. Here, it's the opposite: it's precisely the texture I'm going for.
I stretch my almost dry roller in perpendicular lines, without aiming for 100% coverage. That's not the goal. The objective is really to achieve a layering of texture, and possibly color, for that finish.
I didn't use masking for this step. Since I had already outlined the surface with oil-based polyurethane, I figured I'd have time to quickly wipe away any spills, as acrylic paint doesn't adhere easily to oil-based polyurethane. I worked a bit like a plane taking off, trying to cover the entire surface without necessarily aiming for 100% coverage. This texture is what will ensure the acrylic paint adheres later on.
The first layers of color: turquoise, royal blue, and black.
For the paint, I set up a sheet of parchment paper, which allows me to spread the paint evenly on the roller. I used PBO brand acrylic paint, turquoise blue, for this first layer. The general idea is to start with the lightest colors and gradually move to darker shades.
I use very little paint on the roller, just enough to spread it evenly and prevent it from drying out. The application is the same as for primer: the paint will adhere in some areas, not others. It's painstaking work, but by layering the colors and textures, you achieve the desired grunge effect for the guitar's back.
Once the turquoise base coat was applied, it would continue to show through slightly in subsequent layers. The second color is a vibrant, regal royal blue, which becomes the main color. I've noticed that the darker a color is, the less you need: so I really spread this acrylic (a dollar store product, thinner than PBO), and the effect quickly became more dramatic. I let it dry completely before applying a second coat of royal blue, to really build up the effect.
Next comes the black. Here, you really need to wipe the roller well and use only its weight to add extra texture and small dark dots, without overdoing it. It would be very easy to ruin the result by adding too much black. It adds a slightly dark and worn look, which I'll reinforce later around the symbol. At this stage, the background was ready, with a color and texture quite close to what I was looking for. It just needed a little more black to blend everything with the outline.
The stencil: a patriotic symbol for Saint John's Day
That's when patriotism struck. It was the time of the national holiday, Saint-Jean in Quebec. I'm not usually very supportive of these things, but the moment was relevant and it inspired me: I wanted to make a stencil in the shape of a fleur-de-lis.
I printed the design from the computer; as it was too large for a single sheet, I spread it across two sheets before cutting out the outline with a craft knife. This allowed me to obtain a precise shape, applied in the same way as for the previous colors, but this time in white.
I even wondered, at first, if I shouldn't just paint the fleur-de-lis freehand. In the end, I'm really glad I took the time to make this stencil: it gave me a nice, clean shape. Perhaps I should have transferred it onto sturdier cardboard, rather than risking it with just paper, because the roller tends to catch on the stencil and pull the thinner parts up with the paint.
I still risked positioning it by eye, even if it was a little crooked, using the same white acrylic paint. I didn't let the blue dry before applying the white on top, so the colors blended a bit—but it wasn't a problem, since I applied at least two layers of white. The goal wasn't to have 100% coverage, just to get clean outlines for the symbol.
Upon removing the stencil, the result was exactly what I wanted: the shape is crisp, even though the color mixing produced a slightly muted white, which is precisely the desired effect. To add a bit more definition, I went back over the symbol with black, delicately blending everything together without it looking too obvious. I took the opportunity to emphasize the outline a little more, to guide the eye around the shape and soften the somewhat harsh transition between the blue and black around the edge of the guitar.
Sealing and varnishing: the multi-layer polyurethane technique
For the light finish, I had already applied an oil-based polyurethane to the back of the neck, the back of the body, and the edges, after applying an opaque black stain to those areas. But for the top, since I didn't want any stain, I went with a water-based polyurethane—actually, a high-gloss floor finish, thoroughly mixed to avoid settling, and applied with a brush.
The first coat primarily serves to seal the paint and begin filling in the texture. It's applied somewhat like an airplane taking off, starting from the inside of the body and working outwards, intentionally extending beyond the edges. After this first coat, everything still appears very textured, but the important thing is that the paint is sealed.
Once this layer is completely dry, you can apply it more neatly, ideally with a foam brush. The technique remains the same: always work from the inside out, extending slightly beyond the edges, using the correct angle and almost no pressure on the brush—just its own weight. Applying too much pressure will create bubbles.
The secret lies in speed and precision: move slowly, but with few strokes, making no more than two passes over the same area. You have about 10 seconds before the finish starts to set, so it's better to work quickly rather than repeatedly going back over the same spot, which incorporates air and creates bubbles.
After three coats, the roller texture is still very much present. It is at this point that I allow myself a light sanding with fine-grit paper, not to flatten, but mainly to give the polyurethane grip so that it adheres well to the previous coat — unlike a lacquer, it does not melt with the layer below.
Layer by layer (around the fifth or sixth), the roller's texture gradually transforms into an orange peel effect, eventually filling in almost completely and leaving only simple brushstrokes, which are essentially layers of paint. Small bubbles that appear while the finish is still liquid can be popped with a dry brush.
After a dozen coats, it's not yet smooth, but the texture is sufficiently filled and the finish thickness is there. This is precisely why it's often said that a spray finish gives a completely different result than a brush finish: without the equipment to project the paint, you can't aim for the same level of finish from the outset. There are still visible brushstrokes, but the goal at this stage was to build up enough material. We'll take care of the rest later.
Next step: a month of drying before polishing
I'm going to let this guitar harden for at least a month before doing a final sanding to level the finish, then sanding finer and finer up to 2000 grit, and finally polishing everything to get a smooth, mirror finish.
Let me know in the comments what you think, and especially, what you think still needs to be done to make this guitar truly exceptional. In the meantime, tinker with your guitars, play your guitars, and create artistic projects that reflect your personality!
See you very soon in the next video!